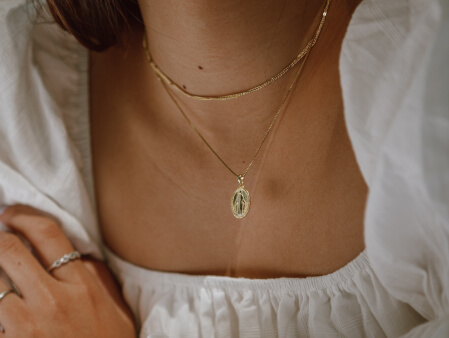
Just how repair a twisted necklace without breaking it ?
Quick Answer
To untangle a twisted necklace without breaking it, lay it on a flat, hard surface and apply a drop of baby oil or olive oil to the knot. Gently use two straight pins or sewing needles to tease the tangled links apart, working slowly from the outside edges toward the center to avoid damaging the chain.
What is custom necklace in relation to Just how repair a twisted necklace without breaking it ?
Key Takeaway: A custom necklace often features delicate, personalized elements like name pendants or birthstones, making it highly susceptible to complex knots that require gentle, patient untangling techniques to prevent permanent damage.
Welcome to the ultimate, comprehensive guide on how to salvage your tangled jewelry. There is nothing quite as frustrating as reaching into your jewelry box to grab your favorite piece, only to pull out a tangled, knotted mess. When that jewelry happens to be a custom necklace—perhaps a piece bearing the names of your children, a bespoke pendant, or a personalized gift from a loved one—the frustration is compounded by deep sentimental value. You want to fix it, but you absolutely do not want to break it.
In this extensive guide, we will explore every facet of detangling delicate chains. Because personalized jewelry is often crafted with specific, intricate chain types to support pendants, locks, or engravings, they are prime candidates for getting twisted in jewelry boxes. We will cover why chains tangle, the tools you need, step-by-step methods for different types of knots, and how to properly store your custom necklace to prevent future disasters.
### Understanding Why Necklaces Tangle
Before we can fix the problem, it helps to understand the mechanics of a tangled necklace. Chains tangle due to a mix of material physics, friction, and storage habits. Fine metals like gold, silver, and platinum are relatively soft. When jostled together, the links catch on one another. Add a pendant into the mix, and you have a heavy object pulling chains into tight, complex knots.
Thin chains, such as snake chains, box chains, and rope chains—which are frequently used for custom name necklaces—are notorious for twisting. The curved surfaces of the links naturally slide and interlock under pressure. When a custom necklace is left in a heap, gravity and movement force these links to wrap around each other, creating microscopic friction points that tighten the knot every time the chain is moved.
### The Emotional and Financial Value of a Custom Necklace
A custom necklace is not just a piece of metal; it is a wearable story. Whether it is a bar necklace engraved with a significant date, a coordinate necklace marking a special place, or a photo projection necklace, these pieces are irreplaceable. Standard jewelry cleaning and repair rules apply, but extra caution is required. Yanking a standard chain might result in needing a simple soldering repair. Yanking a custom necklace could permanently damage an engraved surface, shatter a delicate pendant, or break the tiny jump rings holding the bespoke elements together. Therefore, patience is your most valuable tool.
### Essential Tools for Untangling Jewelry
Attempting to fix a twisted necklace with your bare fingers is usually a recipe for disaster. Fingers are too bulky and oily, often tightening the knot rather than loosening it. Before you begin, gather these household tools:
1. **Two Straight Pins or Sewing Needles:** These are your primary wands for detangling. Their sharp points allow you to isolate single links within the knot.
2. **Baby Oil, Olive Oil, or Mineral Oil:** Lubrication is key. It reduces the friction between the metal links, allowing them to slide over one another smoothly.
3. **A Flat, Hard Surface:** A kitchen table, a granite countertop, or a glass cutting board. Never try to untangle a necklace on a soft surface like a bed or carpet, as the chain will sink in and the pins will catch on fabric.
4. **Good Lighting:** You need to see the microscopic details of the knot. A bright desk lamp or natural sunlight is ideal.
5. **Tweezers (Optional):** Fine-tipped tweezers can help grip the chain, but be careful not to squeeze too hard and scratch the metal.
6. **A Magnifying Glass (Optional):** If your custom necklace features a very fine chain, magnification can help you see exactly how the links are woven together.
7. **Paper Towels or a Soft Cloth:** For wiping away excess oil once the job is done.
### Step-by-Step Guide: The “Lubrication and Patience” Method
This is the safest and most reliable method for fixing a twisted necklace without causing any structural damage.
**Step 1: Prepare the Workspace**
Find a quiet place where you will not be disturbed. Lay down a plain white paper towel or cloth on your hard, flat surface. The white background provides high contrast, making it easier to see the metal links of your custom necklace. Ensure you have optimal lighting directly over the workspace.
**Step 2: Unclasp the Necklace**
Before doing anything, open the clasp of the necklace. If the clasp is threaded through the knot, freeing it will immediately release some of the tension. Lay the necklace out flat on the surface.
**Step 3: Apply Lubrication**
Dip a cotton swab (Q-tip) into your chosen oil (baby oil works exceptionally well). Dab the oil directly onto the tightest part of the knot. You do not need to soak the jewelry, but ensure the knot is thoroughly coated. Wait about 5 to 10 minutes. The oil will seep into the microscopic spaces between the links, drastically reducing the friction that is holding the knot together.
**Step 4: Assess the Knot**
Look at the knot. Usually, it looks like a tight, dark ball of metal. Your goal is not to pull the ends apart, but to loosen the center of the knot. Identify the largest loop you can see within the knot.
**Step 5: Use the Pins**
Take one straight pin in each hand. Insert the tip of one pin into the center of the largest loop you identified. Use the second pin to hold the knot steady. Gently pull the loop outward. If it resists, stop. You are pulling too hard. Use the pins to gently scrape at the inside of the knot, pulling individual links apart. Work in a circular motion, constantly rotating the knot to attack it from different angles.
**Step 6: The “Push, Don’t Pull” Technique**
A common mistake is pulling the ends of the chain. Instead, push the loops of the knot. If you see a loop that looks loose, use your pins to push it through the knot from behind. This pushing motion naturally expands the knot, creating slack.
**Step 7: Persistence**
Depending on the severity of the tangle, this process can take anywhere from five minutes to an hour. Keep reapplying tiny amounts of oil if necessary. Do not use your fingernails, as they will tighten the knot and can scratch softer metals like gold or silver.
### Dealing with Complex Tangles Involving Pendants
A custom necklace often features large, heavy, or multi-layered pendants. Sometimes, the chain gets so tightly wrapped around the bail (the loop that connects the pendant to the chain) that it seems impossible to fix.
When dealing with pendants, gravity is your friend. Hold the pendant firmly and let the chain hang freely. Gently shake it. Sometimes, the weight of the pendant will naturally pull the chain loose. If it doesn’t, lay it flat. Focus on freeing the chain from the bail first. Use a pin to widen the gap around the bail connection. Because the pendant is heavy, the chain will usually want to slide off once there is enough slack.
### The Baby Powder Method (Alternative)
If you are hesitant to use oil on a porous custom necklace (for example, one with pearls, opals, or unglazed ceramics), you can use baby powder or talcum powder. Dust the knot with powder. The powder acts as a dry lubricant, absorbing moisture and allowing the metal to slide. Use the same pin technique described above. Note that you will need to clean the necklace thoroughly afterward to remove the powdery residue.
### The WD-40 Method (For Stubborn Knots)
For extreme, days-old knots on sturdy metal chains, WD-40 can be a lifesaver. Spray a tiny amount of WD-40 onto a cotton swab and apply it to the knot. The penetrating properties of the solvent will break through almost any friction. However, use this with extreme caution. WD-40 can damage certain delicate gems, enamel work, or plating used on custom fashion jewelry. Always test a small, inconspicuous area first.
### What NOT to Do
– **Never use scissors or knives:** Attempting to cut the knot or pry it with a sharp blade will almost certainly cut the chain or severely scratch the metal.
– **Do not pull the ends:** Pulling the clasp and the end of the chain is the quickest way to turn a loose knot into a dead knot that only a jeweler can fix.
– **Avoid using your teeth:** It might be tempting to hold one end with your teeth, but this can damage the clasp, harm your teeth, and introduce saliva, which can tarnish the metal.
– **Do not use pliers:** Pliers will crush the delicate links of your chain, causing permanent damage that requires expensive repairs.
### Cleaning Your Necklace Post-Untangling
Once you have successfully untangled your custom necklace, it will likely be covered in oil or powder. Cleaning it properly is crucial.
**For Solid Gold, Silver, or Platinum Chains:**
Fill a small bowl with warm water and a few drops of mild dish soap. Submerge the necklace and let it soak for 10 minutes. Gently scrub the chain with a soft-bristled toothbrush (like a baby toothbrush) to remove any residual oil or dirt from inside the links. Rinse thoroughly under warm running water. Pat it dry with a microfiber cloth and let it air dry completely before storing.
**For Necklaces with Gemstones or Custom Elements:**
If your custom necklace features delicate stones (like emeralds, opals, or turquoise), do not submerge it. Instead, dampen a soft cloth with the soapy water and gently wipe down the chain. Use a dry cloth to immediately absorb any moisture.
### The Ultimate Guide to Preventing Future Tangles
Now that your custom necklace is fixed and sparkling clean, you want to ensure it never gets twisted again. Proper storage is the key to preventing knots.
**1. Individual Pouches or Boxes:**
Never throw your necklaces into a large jewelry box together. Store each custom necklace in its own small, soft pouch or a separate compartment in a jewelry organizer.
**2. The Drinking Straw Trick:**
This is a classic and highly effective method for thin chains. Cut a plastic drinking straw to a length slightly shorter than your necklace. Thread the chain through the straw, leaving the clasp and a tiny bit of chain hanging out of one end, and the bulk of the chain hanging out of the other. Clasp the necklace together outside the straw. This keeps the chain perfectly straight and prevents any tangling.
**3. The Plastic Wrap Method:**
Lay a sheet of plastic wrap flat on a counter. Place your unclasped necklaces on the plastic wrap, spacing them out. Fold the plastic wrap over the necklaces, sealing them in. The friction of the plastic wrap prevents the chains from moving and intertwining.
**4. DIY Wall Organizer:**
For extensive collections, install a small corkboard or a piece of decorative wood on your wall. Screw in small hooks. Hang each custom necklace on its own hook. This not only keeps them completely tangle-free but also turns your collection into a piece of wall art.
**5. Travel Hacks:**
When traveling, the movement inside a suitcase is a breeding ground for knots. Use a pill organizer (a daily pill box). Coil each necklace and place it into its own day compartment. Close the lid. They will remain perfectly separated throughout your journey.
### How Chain Types Affect Tangles
Understanding the anatomy of your custom necklace chain can help you prevent knots.
– **Cable Chains:** These are standard, symmetrical chains. They are moderately prone to tangling.
– **Curb Chains:** These feature twisted, interlocking links that lay flat. They tangle, but usually in a way that is easy to pull apart by hand.
– **Rope Chains:** Designed to look like a twisted rope, these chains are notorious for severe knots. If a rope chain tangles, the links grip each other fiercely.
– **Snake Chains:** Made of tightly woven rings that create a smooth, solid appearance. When these twist, they can kink permanently. They require extreme care and the oil method.
– **Box Chains:** Square links that are very strong, but when tangled, they form rigid, hard knots.
### When to Seek Professional Help
Sometimes, a knot is simply too tight, or a custom necklace is too valuable to risk damaging. If you have spent over an hour working on a knot with no progress, or if the chain is visibly stretching and about to snap, stop. Take the necklace to a professional jeweler.
Jewelers have specialized magnification tools, micro-pliers, and years of experience. They can usually untangle a chain in a few minutes. If your custom necklace features a highly complex design or expensive diamonds, the cost of professional repair is worth the peace of mind.
### The Emotional Reward
Taking the time to carefully repair a twisted necklace without breaking it is a labor of love. When you wear that beautifully restored custom necklace, you will appreciate it even more. It is a testament to your patience and care for your belongings. By following the lubrication and pin method, and implementing smart storage solutions, your personalized jewelry will remain tangle-free and beautiful for generations to come.
Why does custom necklace matter for readers?
Understanding this topic is vital because personalized jewelry often holds immense sentimental and financial value that cannot be easily replaced. A custom necklace is frequently a cherished gift or a commemorative keepsake, meaning that a hasty, careless attempt to pull apart a stubborn knot could irreversibly stretch, warp, or snap delicate suspending letters, pendants, or fine metal links. Learning the correct, damage-free untangling techniques protects your meaningful investment, saves you from potentially costly jeweler repair fees, and ensures that your most treasured, customized pieces remain in perfect, wearable condition for years to come.
Frequently Asked Questions
What is custom necklace in relation to Just how repair a twisted necklace without breaking it ?
A custom necklace often features complex, delicate chains and personalized pendants that easily tangle. When repairing these unique pieces, you must avoid pulling forcefully. Instead, use gentle lubricants and pins to tease the knot apart, ensuring the special customized details aren’t bent or broken.

About author